Introduction
I’ve always been drawn to wilderness survival. It’s about creating a safe place in nature’s wild. I’m excited to share how to build a survival lean-to shelter, a skill that could save your life.
Whether you’re experienced or new, learning to build a lean to shelter is key. This structure has protected explorers for centuries. It keeps you safe from the weather and gives you a sense of security in the wild.
Why Shelter is Your First Priority
The “Rule of Threes” in survival situations puts shelter at the top of the list. It’s not just about staying dry; it’s about maintaining body heat and feeling secure. Whether I’m using a lean-to or a debris hut, having a safe space helps me think clearly and plan my next steps.
Protection from the Elements
A good shelter shields me from rain, wind, and extreme temperatures. I make sure my roof is water-resistant and the floor is insulated from the cold ground. Positioning is key – I build with the wind at my back and on high ground to avoid water pooling.
Understanding these fundamentals has saved me more than once. Whether it’s a simple lean-to or a more complex A-frame, knowing how to build a shelter in various environments is a skill I never take for granted.
Lean-To Hack #1: If you have a tarp, emergency blanket, or even a large plastic sheet, use it as the roof of your lean-to. This hack provides excellent waterproofing and can help reflect body heat back toward you. Secure it tightly with rope, paracord, or even strips of fabric tied to surrounding trees or poles.
Essential Tools and Materials for Your Lean To Shelter
Building a bushcraft shelter needs careful planning and the right tools. I’ve spent years learning about outdoor shelter techniques. Now, I’m excited to share what I’ve learned about the tools and materials for a sturdy lean-to.
Tools Required

When building an emergency shelter, I focus on quick construction using natural materials. Essential tools include:
- A folding saw
- A survival knife
- Cordage
- A tarp (optional but extremely helpful)
To make your shelter-building process smoother, consider having some essential tools on hand. Check out our Survival Gear Essentials guide for recommended items that could make all the difference.

Stay dry and prepared on any adventure with this essential waterproof tarp. Compact, durable, and ready for any weather, it’s the reliable protection you need in the great outdoors. Don’t wait—click now to get yours and be prepared for whatever comes your way!
Natural Building Materials
Nature gives us most of what we need for a lean-to shelter. I look for:
- Tree branches or sticks (6-8 feet long)
- Spruce boughs
- Fallen trees
- Leaves and moss
Optional Equipment
While not necessary, these items can improve your outdoor shelter:
- Emergency blanket
- Mosquito / Insect mesh (30 square feet)
Choosing the Perfect Location
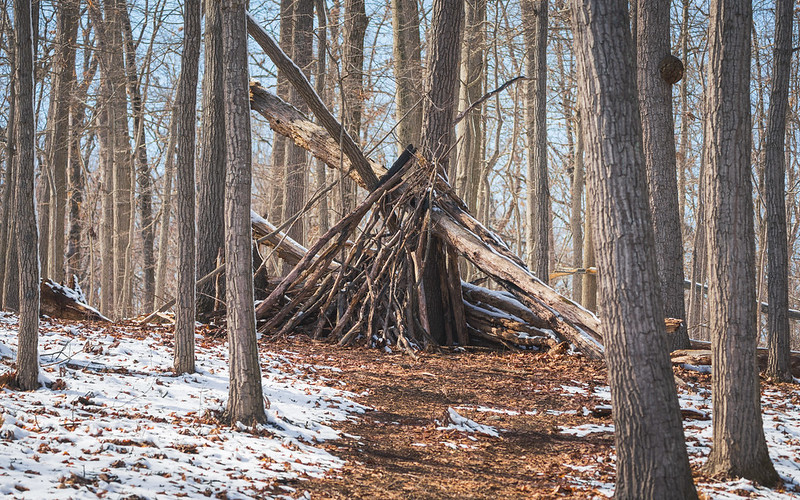
Finding the right spot for your wilderness shelter is crucial. It can make a big difference between a good night’s sleep and a bad one. It’s not just about finding a flat area.
Widowmaker Assessment
Safety is the top priority when picking a shelter site. I always check for widowmakers – dead trees or branches that could fall. During times of natural disasters, weather is often unpredictable, making it even more important to assess trees.
Wind Direction Considerations
Knowing the wind patterns is essential. I look for natural windbreaks like dense trees or hills. These spots protect you from harsh winds without putting you at risk on hilltops or ridges.
Lean-To Hack #2: In a pinch, your poncho or rain jacket can serve as an insulated back wall or side for your lean-to shelter. This will provide additional wind protection and rain resistance, especially if you layer it with natural materials like leaves or branches for added insulation.
Step-by-Step Construction Guide
Building a lean to shelter is a key bushcraft skill. I’ll show you how to do it, from setting up the support to adding the roof. This shelter keeps you safe from the weather in the wild.
Building the Frame
I pick two trees that are 6 to 8 feet apart. This is a good size for most people. If trees aren’t around, I use logs of the same height. The support structure is the main part of the lean to shelter.
Next, look for a long, thick branch that can serve as the main support for your shelter. This branch is called the ridgepole, and it needs to be strong enough to hold up smaller branches. Try to find one that’s about 6–8 feet long and about as thick as your wrist. Check that it’s sturdy by gently bending it—if it doesn’t snap or crack, it’s likely a good choice. Fresh wood is best because it’s stronger and more flexible than dry wood.
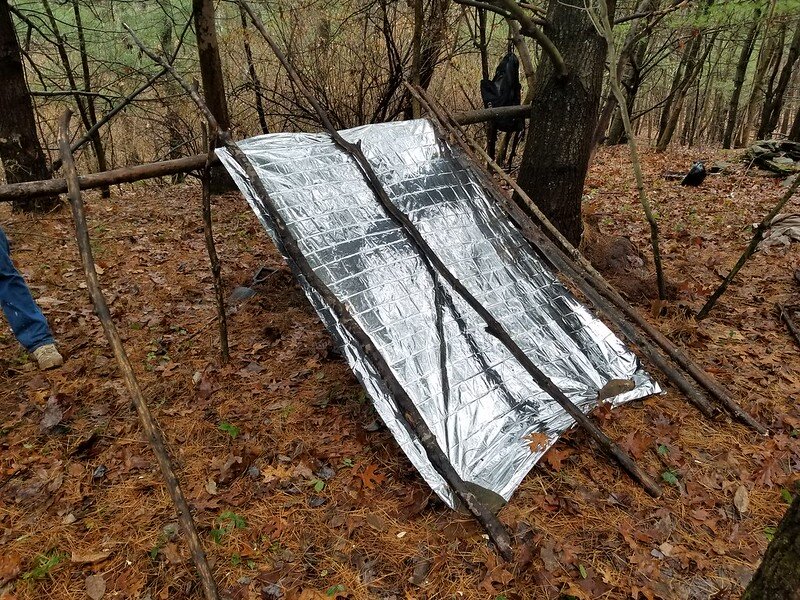
Then, I put a ridgepole between the trees. It should be longer than the space between the trees. I use rope or Y-shaped branches to tie it down. After that, I add spars from the ridgepole to the ground, making the shelter’s frame.
Next, it’s time to build the slanted wall of your lean-to. Find smaller branches that are around 3–5 feet long and a little thinner than the ridgepole. Place one end of each branch on the ground and lean the other end against the ridgepole at an angle. Start placing these branches at one end of the ridgepole and work your way to the other end, spacing them a few inches apart so you don’t have any large gaps. This forms the basic shape of your shelter.
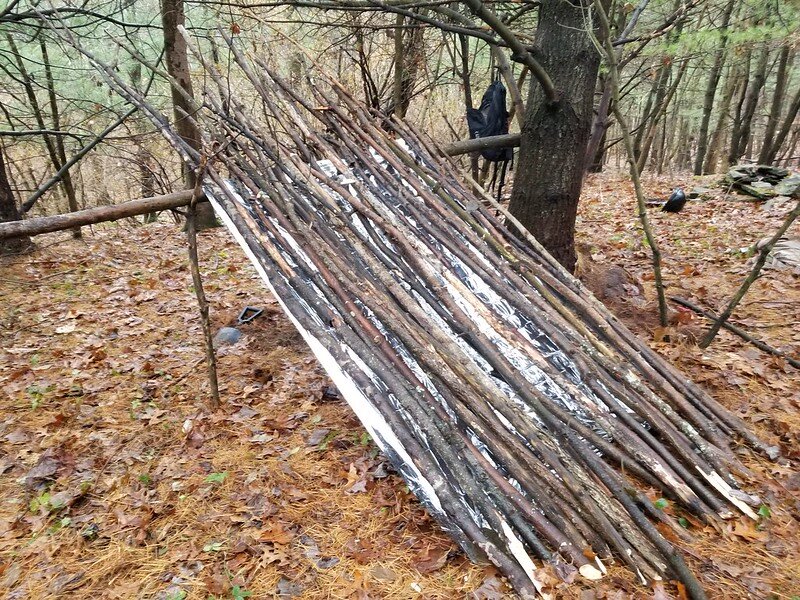
Once all the branches are leaning against the ridgepole, gently press on them to make sure they’re stable. They should feel solid and not move easily. If they seem loose, push them deeper into the ground or try adding rocks around the base to hold them in place. If you have extra rope or vines, you can tie the smaller branches to the ridgepole for extra strength.
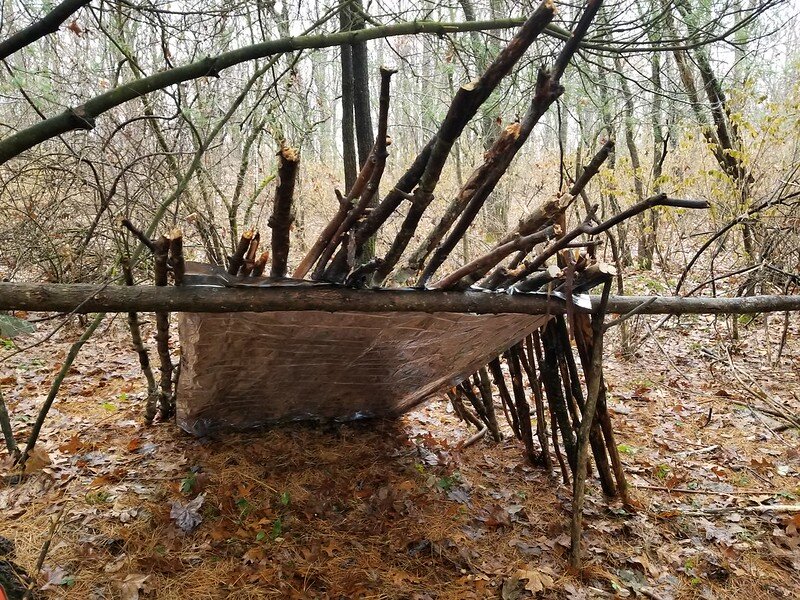
Lean-To Hack #3: If your shelter location is in a less wooded area with limited sturdy branches, consider using your backpack or hiking poles as part of the lean-to frame. You can anchor the frame with the poles and create structure using any available rope, combined with lighter branches or even long grass for the sides.
Covering the Roof: What to Use
Now that your lean-to frame is ready, it’s time to cover it. Adding layers to the roof will help protect you from rain, wind, and cold. Here are some materials you can use:
- Leaves and Pine Needles: Gather a pile of dry leaves or pine needles and layer them over the branches. These materials are great for keeping out rain and adding insulation, which helps keep you warm.
- Pine Boughs: If there are pine trees nearby, you can use pine boughs (the leafy branches of pine trees). Layer these branches thickly over the shelter frame. They’re sturdy, provide good coverage, and help keep out the wind.
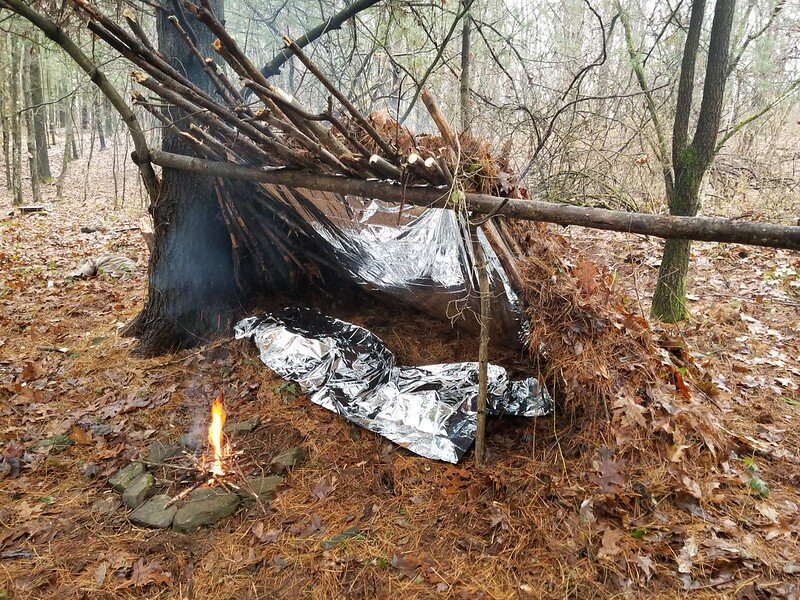
- Tarp or Emergency Blanket: If you have a tarp or emergency blanket, lay it over the frame for even better weatherproofing. A tarp will help keep you extra dry in rainy weather, while an emergency blanket can also reflect your body heat back into the shelter.
- Combination: For the best protection, try combining natural materials with a tarp or blanket if you have one. Put the tarp over the shelter frame first, then add a layer of leaves or pine needles on top. This double layer keeps you warm, dry, and better protected from the weather.
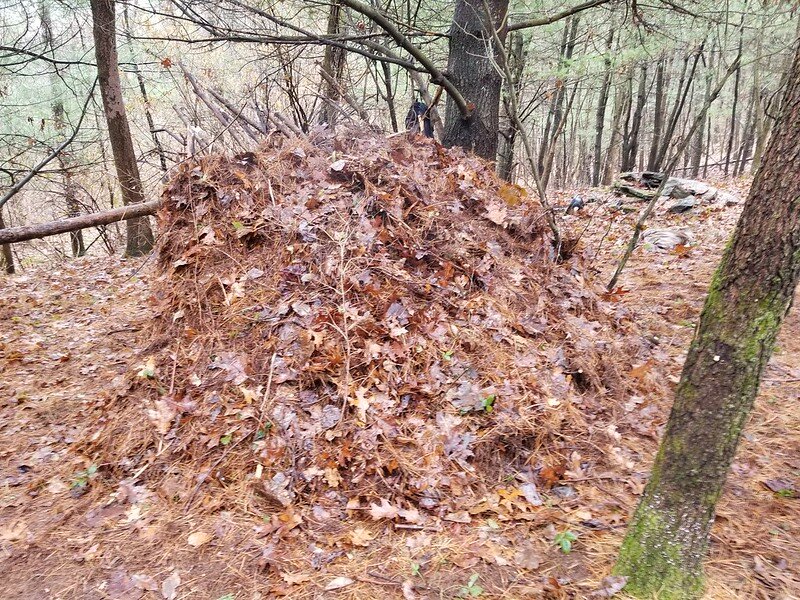
Remember, practice makes perfect. Each lean to shelter you build will be better than the last!
By following these steps, I can make a useful lean to shelter in the wilderness. It’s a fulfilling task that improves my survival skills and connects me with nature.
More Points To Consider
A survival lean to shelter is crucial in wilderness emergencies. The right techniques can make your shelter more effective against bad weather. Let’s look at some key strategies to keep you safe and dry.
I always try to make my lean to shelter’s roof steep. This helps water run off quickly, preventing leaks. I also add natural materials like spruce boughs on the roof for extra waterproofing.
To keep the ground dry, I use leaves or pine needles as a barrier. This simple step keeps me dry and comfortable. For wind protection, I place my shelter to block the wind. I use big rocks or dense plants as windbreaks.

If I’m using a fire for warmth, I keep it one full stride away from the shelter. This keeps me safe while warming me up. With these methods, my shelter can make the inside temperature rise by over 40 degrees Fahrenheit, even in bad weather.
Enhancing Your Lean To Shelter
I’ve spent many nights in wilderness shelters. I’ve learned how to make them cozy. A good lean-to can feel like home in the wild. Let’s look at ways to improve your survival shelter.
Adding a Sleeping Platform
Having a raised sleeping area is important. I use strong branches to make a platform. Then, I cover it with 8-10 inches of pine boughs for warmth.
For extra comfort, I add leaves or moss on top. This makes my bed soft and warm.
Fire Placement Strategy
Having a fire in the right spot is key to staying warm. I dig a 6-8 inch deep fire trench in front of my shelter. Then, I build a rock wall about 3-4 inches higher than my shoulder.
This setup reflects heat into my shelter. It keeps me warm all night.
Lean-To Hack #4: If you have a Mylar (space) blanket, you can add it to the inside wall of the lean-to facing you to reflect warmth. This hack not only makes the shelter warmer but also provides a bit of light. The blanket’s reflective properties can help signal for rescue, as well.
Natural Insulation Methods
To stay warmer, I use natural materials around my shelter. Leaves, moss, and pine needles work well. I stuff them between the poles and on the roof.
This makes my shelter cozy and keeps out wind and rain. Remember, a smaller lean-to is quicker to build and easier to heat. I keep mine knee-high for efficiency. With these tips, my survival shelter becomes a cozy haven in the wilderness.
Conclusion
I’ve shared key methods for making a survival lean to shelter, a crucial skill for outdoor lovers. The lean-to shelter is great because it’s easy to make and works well. It’s fast to build, needs just a few materials, and keeps you safe from the weather. It’s perfect for backpackers who want something light or campers who like a rustic feel.
Don’t forget, the more you practice, the better you’ll get. Try these methods in your backyard before you go into the wild. With the right tools, like a good bushcraft knife, you’ll be ready for your adventures. Stay safe, respect nature, and enjoy the peace of knowing you can make a shelter anywhere.
Subscribe to my newsletter to get notified of new posts!
As an Amazon Associate, I earn commission from qualifying purchases.


